PART TWO OF GETTING ON 1296 EME: THE DISH
When I first saw it, my “new” dish was in pretty poor shape. It had been dropped while removing it from the roof of a horse stable and had been laying in a field. It was warped on one side and was covered in mud. In order to get it into my SUV I had to completely break it down into its individual pieces.
From there it was stored in a small pile of sad parts in our garage awaiting an uncertain future. I already had a 2 meter basic EME antenna and had cobbled a couple of TE1452 amplifiers together to run about 600 watts. This was an exciting time, being able to communicate by bouncing signals weakly off the MOON! I quickly developed plans for expanding the antenna array. But my location in Oro Valley was not ideal, despite being on several acres. I was surrounded by neighbors who weren’t appreciative of my antennas, even as low as they were.
We decided that a major lifestyle change was needed and moved way out in the country as I was nearing retirement. After finding a place in a good radio location, and lots of room, I started building a new radio station. My wife’s only wish was that she get a stable, corral, and miniature donkeys. Happy wife…….
I finished a new 4 yagi two meter array, with a 1500 watt amplifier, and added all sorts of other bands along the way. But I kept hearing of the capabilities of 1296 EME. I had assembled a capable 1296 terrestrial station, learning about microwave radio systems and building a 600 watt amplifier. My thoughts turned toward the pile of dish parts behind my workshop.
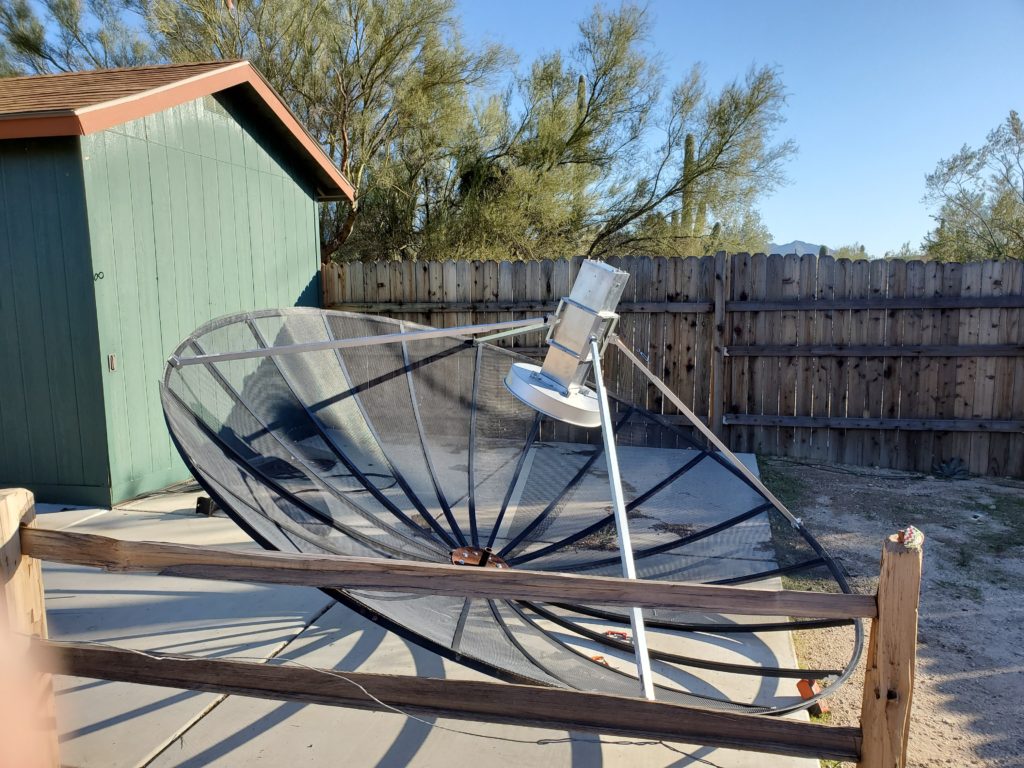
The first task was making sure all the ribs and other major structural pieces were there. I found that a number of the ribs had been bent when it was dropped. But I got them straightened and reassembled the frame. I did a calculation to determine the focal length of the dish. This is important as it helps to select the proper feed horn. I was unable to find one so I ended up getting one built by Mike, KL6M. He does a great job machining the parts, and also made a custom mounting assembly for it. The feed horn is the
actual antenna. The dish just focuses the radio waves into a narrow beam on transmit, and focuses the received signals back to the feed.
So now I had all the major pieces except for one very important component. The mount that would allow for aiming the dish at the sky. There are a number of articles on the web on converting surplus TVRO dishes for azimuth/elevation pointing. And none of them were really useful for the dish mount I had.
After a couple months of looking for ideas I sat down one day and placed all the mounting components on the floor. For a couple days I shuffled the pieces around in different ways and came up with an idea that didn’t need extensive welding. It uses a jack actuator to push a heavy steel arm attached to an equally heavy hinge for tilting the dish up and down. All I needed was a plate welded to a short mast pipe to attach to a rotor. Sort
of….It was time to dig the hole for a single section of Rohn 25 with a flat top rotor section.
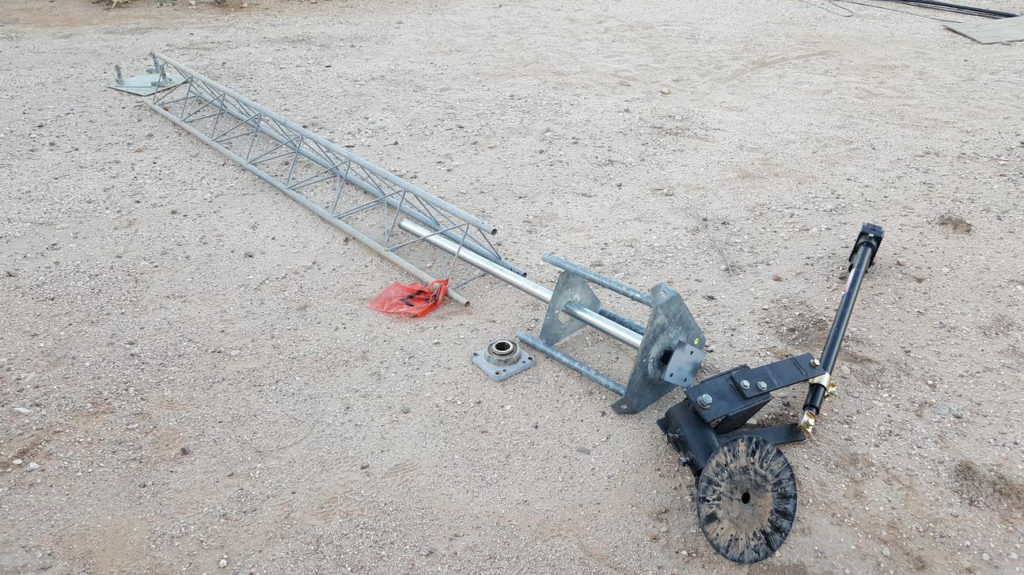
The layout of the tower and the jack screw to elevate the dish
With all the progress, I now had to assemble the mount on the flat top with the rotor and actuator jack to see if these pieces would work together. Our living room floor was a great air conditioned place to accomplish that. And it looked good. I needed a heavy duty rotor that would hold the dish accurately in the wind. The one I chose was the Alpha Spid RAS with a worm drive similar to the actuator. After mounting the feed to the dish, everything was mechanically ready for final assembly.
But before the dish can be placed on the tower you need to get the electrical wiring done to test the rotors and interface them with a computer. The dish focuses the signal into a narrow beam that is not much wider than the moon itself at 1296 MHz. The higher in frequency you go, the narrower that beam of RF gets. So aiming the dish towards the moon is much more critical than it is on 2 meters. You can keep the dish pointed manually, but this takes constant attention. I wanted to have a computer do this job so I could concentrate on other equally important tasks while operating.
This was an intimidating part of the process for me. I am not a computer whiz like the younger folks, so I jumped in and sorted my way through the maze of software programs available. I ordered a Green Heron RT-21 controller and got a program called PSTrotator for satellite and moon tracking. I moved the mount assembly out of the living room into the driveway where I could watch the motors working.
After wiring things up, and a significant loss of hair that I can’t afford, I finally had the rotors “tracking” the moon. It was cool to see it automatically moving the dish plate across the sky. It would take a lot more
work to calibrate the system, but that would wait until the dish was in the air.
NEXT: Dish raising party! Coax, preamp, cables, moon beacons, and SUCCESS!!
Comments are closed